with a few changes. Also get lots of inspiration from http://www.shanty-2-chic.com/2012/06/fancy-x-farmhouse-table.html and http://tommyandellie.com/index.php/2012/01/13/new-and-improved-farmhouse-table-details/
Had family out this week for Easter from Maine...well, this is my usual guys, but the greybeard is my BIL, John,
And for once didn't want the sagging card tables in place for Easter dinner
After scouting plans and picks I came up with some ideas of my own, A. It needed to have a gutter for ice, Diet Cokes, and always Beer for the hub and B. I wanted it sturdy enough to hold me, oh and C everyone needed to fit around it
Tabletop with oversized planters from Home Depot in place, and just in case you don't want cold refreshing beers at your beck and call, use it for plants, kids crayons, candles, the list is endless..
I cut circles out of the bottom, smaller than a bathroom drain plug and then use, you guessed it, bathroom drain plugs to close them, the beer in the bucket, just there to give you a visual
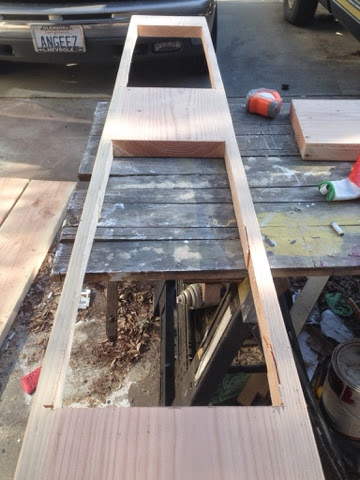
Both cutouts, sanded and ready to go, this is a 2x10 board
Here's a preview of the awesomeness to come!
So as you see, I got my top squared away before I built the base, this was to ensure the cutouts were uninstructed and supported. FYI, each bucket holds a 12 pk of bottles and a few sodas, and the ever important 10 lb bag of ice
Due to the weight of the table, I built the legs 2 ways
Nice but....felt like it could be stronger, so.. I did coat the bottom of the table legs with epoxy. This is on the bottom of the legs, the part that sits on the pool concrete
 Very simple to use, just make sure to tape the area, if you get any where you want to stain, it doesn't take, I know from experience
Dried nice and clear, and keeps the bottom of the table dry when I wash off the cracks, shoes for my table
The Base, or the big bed all my neighbors insisted I was making! I like to sand the heck out of everything, I call it Skateboard Smooth, and start conditioning and staining as I go. Here in Cali, things dry fast, and once it's together, another sand and coat of stain for uniformity. I used KREG HD screws everywhere, but lag screws to attach 4x4 legs for frame, super sturdy, I'll be dancing on this table in no time!

Kregging my way to a new tabletop...
Dry fit to mark the beer gutters for added support
And putting the end boards on, I did Kreg them on, but also added bracing as well. This table is very heavy, and I don't want this tabletop to come away from the base. The extra bracing I used was 2x4 corner braces, 10 of them, for extra support, and for me, with waterproofed screws and lag screws.


Sand and Stain, Sand and Stain....wash, rinse, repeat.....
 3 Coats of Minwax Special Walnut, which I rub on with an old sock, and then immediately wipe off with an old Tshirt
I ended up with 3 coats of Clear Spar Varathane, top and bottom
Party day!
My son and his girlfriend, Hayley modeling my table!
That's how I did it! There wasn't a specific plan I used, but I did look to Ana White for most of my inspiration, pouring over all her tables to come up with a bit here and a bit there. I took inspiration from everywhere, and came up with a Design that will work for years to come.


No comments:
Post a Comment