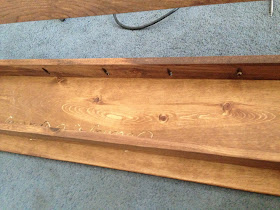
 had a really hard time with the legs, through trial and error I got them, just make sure you leave 3/4 of an inch between the end of the board and your screw...and you'll be fine. I'm an expert on legs now! Also, I had the V on the bottom of it, but for my taste, it looked a little well, cluttered, so I removed it, and loved the sleek lines.
  |
| If you'd like your own wedding bench, complete with custom engraving, and Bows! you can contact me at jim2angie@hotmail.com and I'll get working on it for your special day |
 the Beautiful Couple...My bench fit in perfectly with their mountain wedding
 loads of Signatures, used paint pens from Walmart, thankfully came up with a free reusable build for the pen...http://angidotes.blogspot.com/2013/09/reusable-pen-holder-bonus-gift.html
The Build
 |
| Avoid some bruises, round out the edges. I use 100 grit sandpaper and my palm sander |
 Bottom of the bench, attached, if you look closely, you can see the engraving, looked good, but a neighborhood poll resulted in "too small" so redid it.
I watched a few videos on Utube, headed to Walmart to pick up some ribbon, always use the wire ribbon, and while shopping, I struck up a conversation with another lady picking up ribbon. She asked what I needed it for, and when I told her it was for a wedding bench, she offered to show me how to make them. I bought scissors, the ribbon she recommended, a few water bottles, it was 105 that day, and we went out to the parking lot, using the back of my Tahoe and made ribbons! Now that I type this, I'm glad I didn't end up on a milk carton. Fun fact, she's a 911 operator, and I'm an ER nurse. I made a new friend and got an invaluable bow lesson.
 |
| Close up of my custom engraving, I'm gonna do a post about this...now everything will be personalized! |
If you'd like your own wedding bench, complete with custom engraving, paint pens, and Bows! you can contact me at jim2angie@hotmail.com and I'll get working on it for your special day


No comments:
Post a Comment